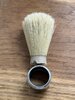
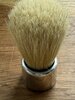
My first Rubberset 400 - 4 light restoration

TobyC

Patriot
I’ve restored quite a few aluminium Rubberset brushes and found that you need to beware of putting too much pressure on the ferrule as the fracture easily. I was fortunate that one of the members on here made a very accurate replacement. I would avoid using a clamp if that’s possible for you.
Here are some of mine - one on the right is original boar whereas the left was a replacement but can’t recall where from.
One tip for you if you get any more Rubberset - if the ferrule is stuck try soaking in a limescale remover before using something like WD40.
View attachment 181692View attachment 181693

You use epoxy on the new knots?
 

UKRob

Forum GOD!
You use epoxy on the new knots?
Yeas Toby. With Rubberset brushes I was able to insert the knot as a tolerance fit so that I could get the required height and then just add a little epoxy with the brush held upside down thereby keeping the threads clean.
 

TobyC

Patriot
Yeas Toby. With Rubberset brushes I was able to insert the knot as a tolerance fit so that I could get the required height and then just add a little epoxy with the brush held upside down thereby keeping the threads clean.
Cool. 👍
 

Sideburns

Über Member
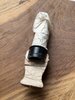
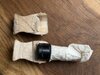
Knot harvesting day - a first for me. Pulled, pulled at a slight angle, pulled a different angle and pulled again, this thing wasn’t budging.
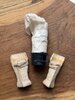
Time for drastic action;

IMG_3544.jpegIMG_3545.jpegIMG_3546.jpeg
It was persuaded to free.
 

Sideburns

Über Member
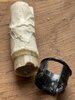
Detached the black plastic cup with a couple of cuts with a junior hacksaw and it was persuaded off with a couple pairs of pliers.
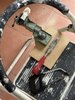
Knot resin base was uneven and had a concave dome to it. This was filed flat and true. The cup ring was salvaged and used as a packer ring by epoxying it back to the filed down knot base. This black plastic packer ring was then filed down to be an interference fit with the Rubberset ferrule. A thin smear of epoxy was applied to the inside of the ferrule and the knot complete with packer ring with slowly twisted into the required position. I didn’t have too much time to play as the epoxy was rapid set. Below are some of the stages, including my makeshift workbench out of our mini stepladder.

IMG_3548.jpegIMG_3550.jpegIMG_3547.jpegIMG_3549.jpegIMG_3551.jpeg
 

Sideburns

Über Member
I thought the knot would come out easier with a wooden handle. I had an Omega with a plastic handle, and I had to saw off the handle there too.
It was a surprise to me how difficult it was to remove. It fought me all the way. Omega really glued that thing in there so well. Thanks for confirming it wasn’t just me who had to cut the handle off to get the knot.

With 20:20 hindsight, I should have bought a knot that presented about 27mm at the base of the handle with a taller loft. The reality is that this was my first attempt, I learned a lot. I can do the job without too much gear and no workshop to speak of and I feel a little more confident at the prospect of doing another should the opportunity present itself.
 
Last edited:
Top