
How I create my SOTD pictures
- Thread starter ChrisVanMeer
- Start date

2hot 2trot
Forum GOD!
Superb review how you set up.
I have always wondered how you achieved those brilliant reflection shots in your images.
Very inspiring and thanks for sharing.
Wayne.
I have always wondered how you achieved those brilliant reflection shots in your images.
Very inspiring and thanks for sharing.
Wayne.


Conservator
Forum GOD!
You always have such beautiful photos. I wish I had the patience, skill, and equipment. Well, I don't so I will just enjoy your photos. 

ShavingB
Forum GOD!
First and foremost, I just want to say that I think your pictures are absolute perfection that I can only strive for. The crispness, quality, colours, reflection and lack of imperfections from dirt etc is incredible!!
However most of us do not have the equipment or skill for such perfection so here is my layman’s method for something similar just not as good.
Equipment:
- iPhone 7
- white piece of paper
- Black t-shirt
- Tactical Torch
- box to support torch
I take a black t-shirt, tactical torch and a piece of paper. I reflect the light to soften it.
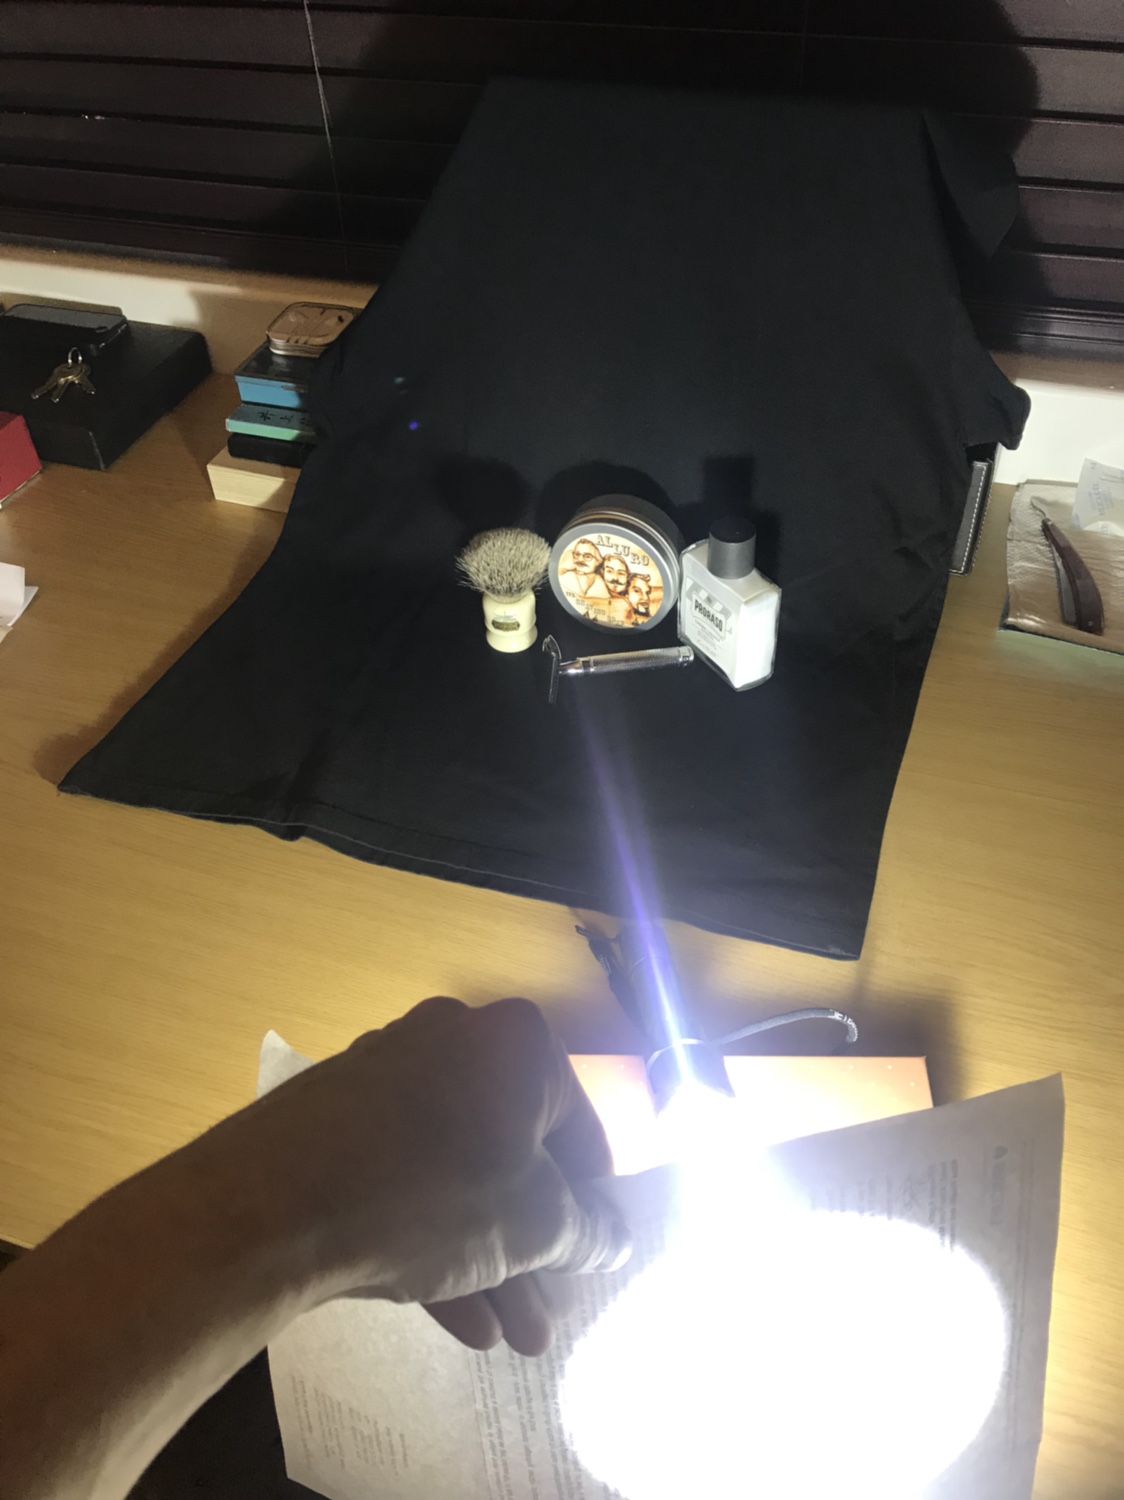
I then use my iPhone 7 to snap a photo focusing on different parts of the image to try get decent lighting. Here is the photo of my last SOTD.

I then run it through a Instagram filter to darken the background and I’m done.
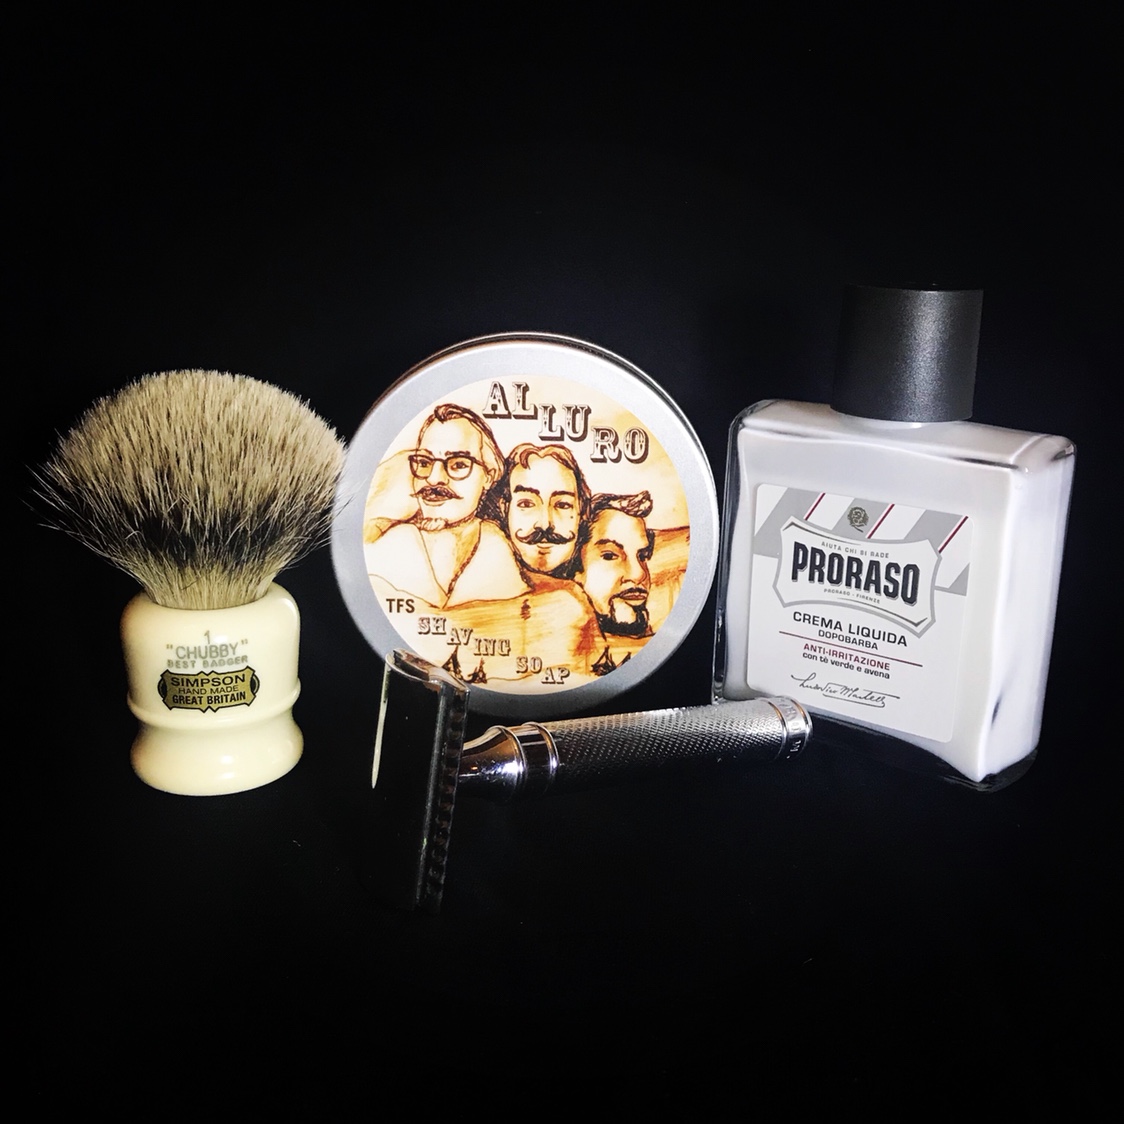
I do loose definition on things, in this case the razor however I am happy with the results and usually takes a couple of minutes to snap a picture.
I do however have a Canon 650D, I think I need to try up my game however I do not have decent editing software..
Anyway love your pictures, keep up the excellent work, I enjoy seeing beautiful pictures like yours!
Sent from my iPhone using Tapatalk
However most of us do not have the equipment or skill for such perfection so here is my layman’s method for something similar just not as good.
Equipment:
- iPhone 7
- white piece of paper
- Black t-shirt
- Tactical Torch
- box to support torch
I take a black t-shirt, tactical torch and a piece of paper. I reflect the light to soften it.
I then use my iPhone 7 to snap a photo focusing on different parts of the image to try get decent lighting. Here is the photo of my last SOTD.
I then run it through a Instagram filter to darken the background and I’m done.
I do loose definition on things, in this case the razor however I am happy with the results and usually takes a couple of minutes to snap a picture.
I do however have a Canon 650D, I think I need to try up my game however I do not have decent editing software..
Anyway love your pictures, keep up the excellent work, I enjoy seeing beautiful pictures like yours!
Sent from my iPhone using Tapatalk

Keep it coming, this is great. I need some inspiration!First and foremost, I just want to say that I think your pictures are absolute perfection that I can only strive for. The crispness, quality, colours, reflection and lack of imperfections from dirt etc is incredible!!
However most of us do not have the equipment or skill for such perfection so here is my layman’s method for something similar just not as good.
Equipment:
- iPhone 7
- white piece of paper
- Black t-shirt
- Tactical Torch
- box to support torch
I take a black t-shirt, tactical torch and a piece of paper. I reflect the light to soften it.
I then use my iPhone 7 to snap a photo focusing on different parts of the image to try get decent lighting. Here is the photo of my last SOTD.
I then run it through a Instagram filter to darken the background and I’m done.
I do loose definition on things, in this case the razor however I am happy with the results and usually takes a couple of minutes to snap a picture.
I do however have a Canon 650D, I think I need to try up my game however I do not have decent editing software..
Anyway love your pictures, keep up the excellent work, I enjoy seeing beautiful pictures like yours!
Sent from my iPhone using Tapatalk

ChrisVanMeer
theshavingdutchman
Today I will run you trough my stock photography method.
Now, I do have a nice lightbox with LED lighting and some nice backdrops, but the secret weapon in this will be the post-processing of the picture. Why is that? Well that's because both the background and the subject are lit by the same lighting source.
This causes the CMOS sensor in the camera to go bonkers. Which results - without any exposure compensation - in a greyish background. With exposure (in this case over-) compensation, one can achieve a more white background. Caveat is that with exposure overcompensation, the subject has the risk of being over exposed. My sweetspot for my lightbox is +0.3EV.
But exposure compensation isn't the holy grail. Actually the only holy grail would be getting a professional lighting table with seperate lighting for both background and subject. But with post-processing the image, you can achieve the same result - it only takes longer.
Here are the steps that I have taken.
Thank you for reading!
Now, I do have a nice lightbox with LED lighting and some nice backdrops, but the secret weapon in this will be the post-processing of the picture. Why is that? Well that's because both the background and the subject are lit by the same lighting source.
This causes the CMOS sensor in the camera to go bonkers. Which results - without any exposure compensation - in a greyish background. With exposure (in this case over-) compensation, one can achieve a more white background. Caveat is that with exposure overcompensation, the subject has the risk of being over exposed. My sweetspot for my lightbox is +0.3EV.
But exposure compensation isn't the holy grail. Actually the only holy grail would be getting a professional lighting table with seperate lighting for both background and subject. But with post-processing the image, you can achieve the same result - it only takes longer.
Here are the steps that I have taken.
- My setup: again the Canon 60D, 18-55mm lens (at 50mm), aperture of f/20, ISO 100. In AV setting the shutter speed will be around 1/14".

- Contrary to my light painting pictures, I only take one photo of the subject. After importing this into Lightroom CC it looks like this.

- I then apply the lens profile and see if Lightroom detects if the picture should be rotated that the subject is completely level to the view.
- After that I run it through RAW Presharpener for a subtle more sharper image.

- Next up: Dfine - to remove the noise.

- Next up Viveza - for my situation (lightbox with single lighting source) - the most crucial step. In Viveza I can pump up the colors of the subject and pump up the brightness of the background, hence creating an image that will "pop".

- Then I will use Color Effex Pro to create more contrast and I neutralise the whites.

- Next up is Photoshop to remove al blemishes / dust particles.

- Almost there...running the image through the Output Sharpener to create a more crisp image for displaying on computer screens.

- And finally - due to the post processing - I repaint the background white within Lightroom using gradient filters.


Thank you for reading!

Wayne
Forum Sod
Great write up. I'd love to be able to do that but photoshop bamboozles me completely. You can't learn Photoshop by yourself you need real help with that program, I have had it but it was useless in my hands so I deleted it. I now use iphone 7 and Axiem photo editor. I cannot compete with your pictures so I will not try, I'll just enjoy yours.
ChrisVanMeer
theshavingdutchman
I learned all editing by myself, no help from internet or books.
But yes, the learning curve is pretty high.
But yes, the learning curve is pretty high.
Wayne
Forum Sod
Well more power to you Sir I just couldn't grasp the program at all it may as well have been in Chinese for the sense I made of it. The good thing about the new app type programs is the ease of everything and it is always in laymans terms as in Lighten, darken, shadows, vibrance making it truly one touch editing I won't get the results you get but for a simple SOTD pic my Chinese lightbox and a few wallpaper samples as backgrounds are perfect. You keep going Chris not only are the photos great your collection of top end shaving gear is always nice to see.I learned all editing by myself, no help from internet or books.
But yes, the learning curve is pretty high.
Last edited:

pimple8
Forum GOD!
Beautiful pics.
I have a Canon 500D and Photoshop since my old man was in graphic/print work but I am a total dummy for photos.
I would really like to have those cool images with the white/black background but I am too lazy to learn. So I take my SOTD pics with my phone camera and edit them a bit with some instagram tools.
I have a Canon 500D and Photoshop since my old man was in graphic/print work but I am a total dummy for photos.
I would really like to have those cool images with the white/black background but I am too lazy to learn. So I take my SOTD pics with my phone camera and edit them a bit with some instagram tools.

mike_the_kraken
Señor member
This is a great thread, appreciate the sharing of technique Chris! I have a long way to go, but had a little fun with light painting tonight - which I’d never tried before. I mostly shoot raw and go to Lightroom for Post.

Last edited:
ChrisVanMeer
theshavingdutchman
Nice first result!This is a great thread, appreciate the sharing of technique Chris! I have a long way to go, but had a little fun with light painting tonight - which I’d never tried before. I mostly shoot raw and go to Lightroom for Post.

Redrock
Forum GOD!
This is my set-up for the shave related pictures. It is not nearly as fancy or professional as the @Darkbulb set-up but is meeting my needs for now. I will see how it goes and make changes as needed.
The box is a 18x18x16 inch moving box from Lowes Home Improvement. I cut the front and side openings. I also put a couple of doors on the top in case I need some top light. The material for the diffuser is muslin cloth. It is thin enough to let the light through and much more durable than paper. I use two spot lights with low wattage lamps and with 5000 Kelvin color temperature bulbs (on the cool side). I have several colors of poster board plus the red velvet I used today for the liner.
I use a 24MP Sony a6000 camera coupled with a Sigma 30mm EX DN F2.8 lens mounted on a Dolica tripod. Currently I am shooting .jpeg but want to branch out to RAW since it gives a wider array of editing options. Lightroom CC and Photoshop 2018 are the editing software of choice. I some times use Photoscape if I am in a hurry.
I use aperture control because it gives me depth of control adjustment. I play with ISO and EV as need to get the desired shot.
Regards,
Ed


The box is a 18x18x16 inch moving box from Lowes Home Improvement. I cut the front and side openings. I also put a couple of doors on the top in case I need some top light. The material for the diffuser is muslin cloth. It is thin enough to let the light through and much more durable than paper. I use two spot lights with low wattage lamps and with 5000 Kelvin color temperature bulbs (on the cool side). I have several colors of poster board plus the red velvet I used today for the liner.
I use a 24MP Sony a6000 camera coupled with a Sigma 30mm EX DN F2.8 lens mounted on a Dolica tripod. Currently I am shooting .jpeg but want to branch out to RAW since it gives a wider array of editing options. Lightroom CC and Photoshop 2018 are the editing software of choice. I some times use Photoscape if I am in a hurry.
I use aperture control because it gives me depth of control adjustment. I play with ISO and EV as need to get the desired shot.
Regards,
Ed